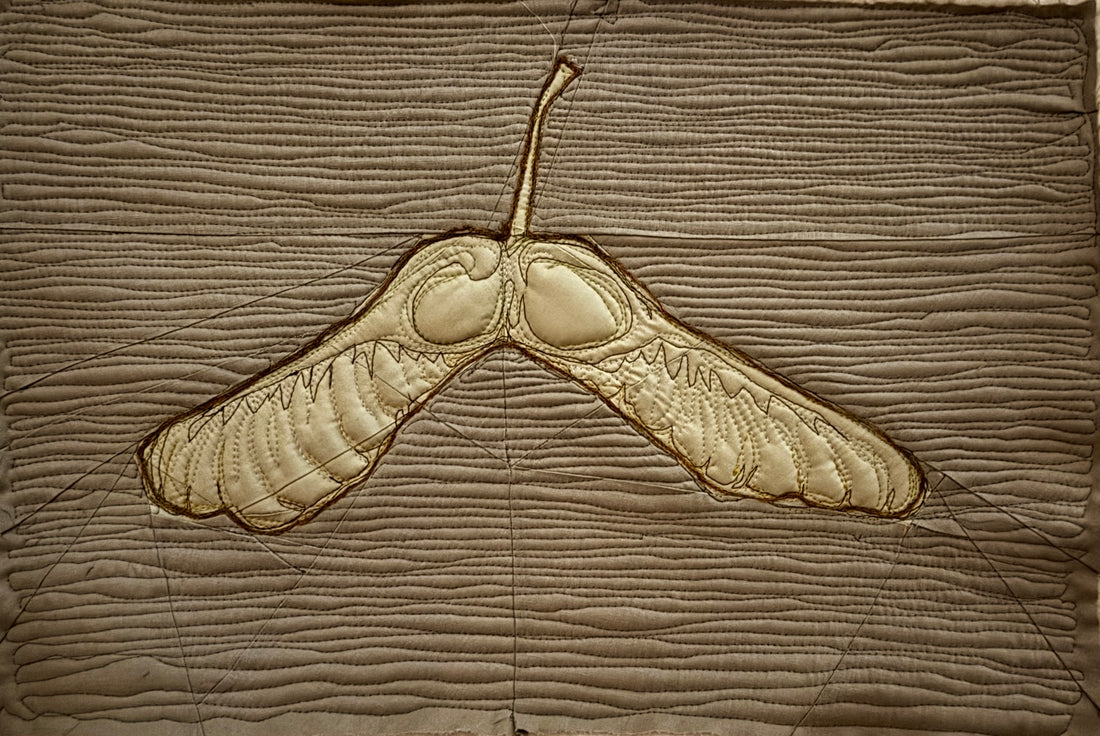
My Journey into Foundation Paper Piecing: Creating a Maple Key Pattern
As I delve deeper into the world of quilting, I recently embarked on an exciting project: creating my very own Maple Key pattern using foundation paper piecing (FPP). This journey has been both a creative challenge and a rewarding experience, and I’m thrilled to share my process and the lessons I've learned along the way.
Discovering Foundation Paper Piecing
Foundation paper piecing is a quilting technique that allows for precision and intricate designs. Unlike traditional piecing, FPP involves sewing fabric pieces onto a printed paper template, which serves as a guide for cutting and stitching. This method is perfect for complex shapes, like my Maple Key pattern, as it ensures that every piece fits together perfectly.
Designing the Maple Key Pattern
Creating my Maple Key pattern was the first step in this journey. I wanted to capture the essence of autumn with its vibrant colors and unique shape. Here’s how I approached the design:
1. Sketching the Design: I started with a rough sketch of the maple key, focusing on its distinctive shape and proportions. This initial sketch helped me visualize how I wanted the final quilt block to look.
2. Breaking It Down: To make the pattern suitable for FPP, I divided my design into smaller sections. Each section would correspond to a piece of fabric, ensuring that I could easily piece them together later.
3. Creating the Template: Using software designed for quilting or even simple graph paper, I created a printable template for each section of the maple key. I made sure to include seam allowances and labeled each piece to keep track of them during sewing.
The FPP Process
Once my template was ready, it was time to dive into the sewing process:
1. Selecting Fabrics: I chose a vibrant palette that reflected the colors of fall—rich yellows, deep oranges, and hints of brown. The contrast between these colors would bring my maple key to life.
2. Cutting Fabric Pieces: Following my template, I carefully cut out each fabric piece, ensuring they were slightly larger than needed to accommodate the seam allowances.
3. Sewing with Precision: With my fabric pieces ready, I began sewing them onto the paper template. The key to successful FPP is to use a smaller stitch length (around 1.5) so that the paper tears away easily after sewing.
4. Pressing and Trimming: After sewing each piece, I pressed them open and trimmed any excess fabric to maintain clean lines and sharp angles.
Completing the Quilt Block
After assembling all sections of my Maple Key pattern, it was time to remove the paper backing. This step revealed the beautiful quilt block I'd created!
I then decided to incorporate this block into a larger quilt design that showcases other autumn-themed blocks, creating a cohesive seasonal piece.
Reflections on My FPP Journey
Creating my own Maple Key pattern through foundation paper piecing has been an incredibly fulfilling experience. Here are some key takeaways from this journey:
- Creativity Unleashed: Designing my own pattern allowed me to express my creativity in ways I hadn’t anticipated.
- Skill Development: FPP has significantly improved my precision in quilting, making me more confident in tackling complex designs.
- Community Connection: Sharing my progress with fellow quilters online has provided encouragement and inspiration from others who appreciate this art form.
As I continue to explore foundation paper piecing and develop more patterns, I'm excited about where this journey will take me next. The Maple Key quilt block is just one of many projects that will fill my quilting space with warmth and creativity this autumn season. If you’re considering trying FPP or designing your own patterns, I highly encourage you to dive in—you might just discover a new passion!
Comments
Check out comments or add a new one.